Route Planner - Additional Tools
- Linda MacDonald (Unlicensed)
Analytics
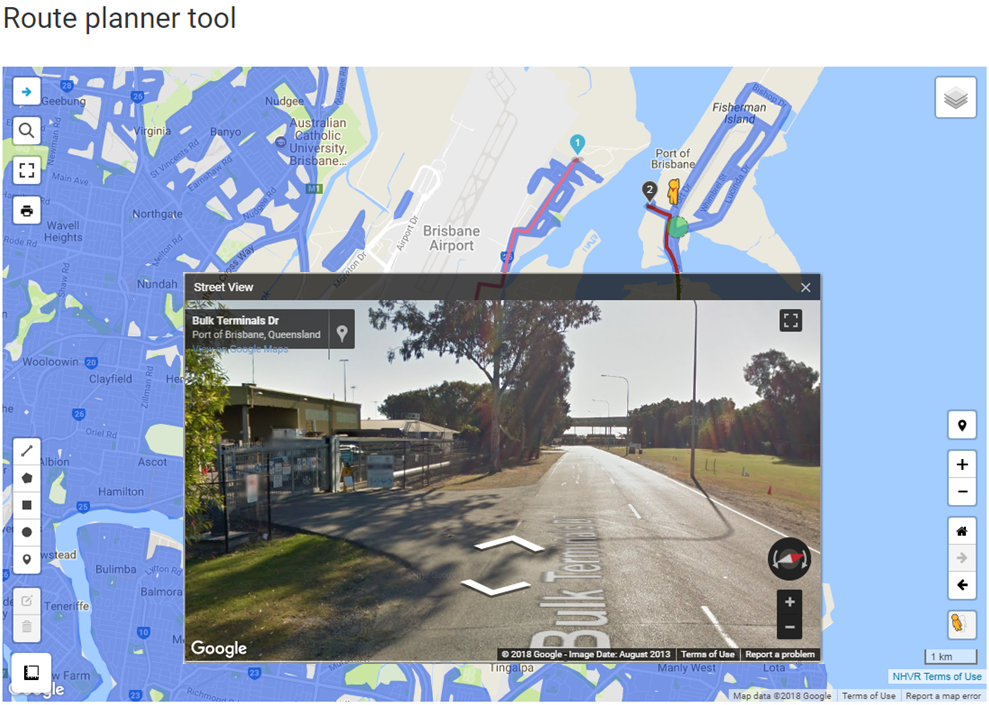
Street View
- Click and drag the Street View icon
 onto the map.
 To view, drop the icon onto the road.
Street View is not available in all areas.
In Street View, use the arrows to travel along the road.
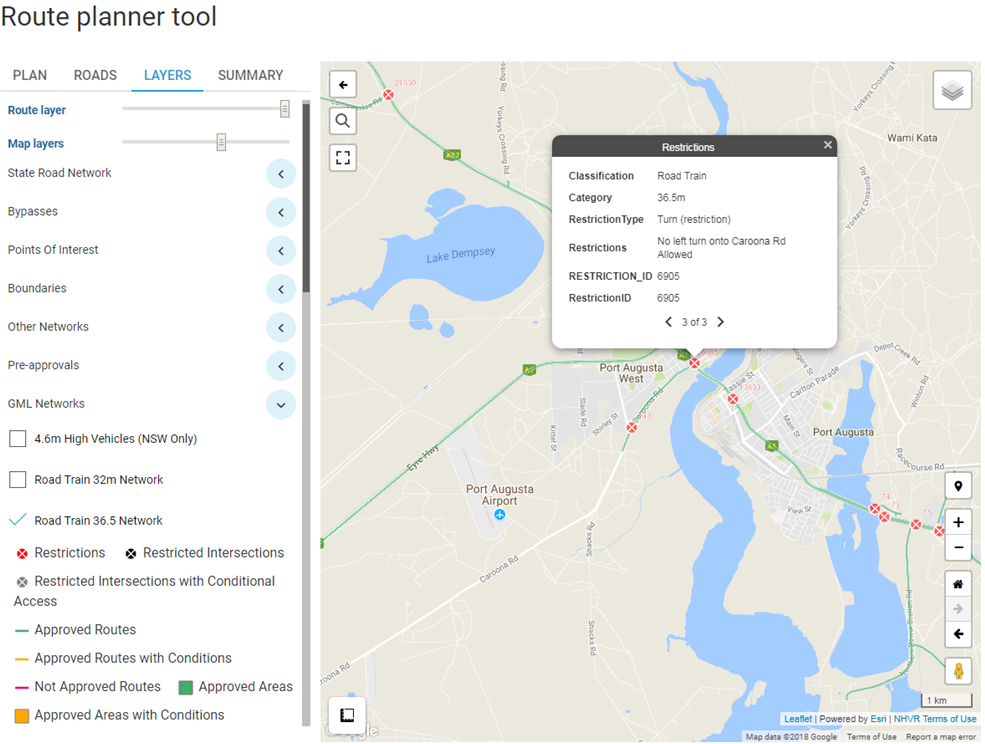
Layers Tool
- On the LAYERS tab, the route layers can be faded using the slider. This can make it easier to see the network or road names.

On the LAYERS tab, the map layers can also be faded using the slider.

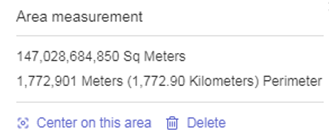
Measure Tools
- Select the measure tool icon
 in the bottom left of the map.
 - Click on the map to place points for measuring, then select Finish measurement or double-click after placing the final point.

A pop-up box will appear with all measurement details. Here, the measurement can also be deleted.
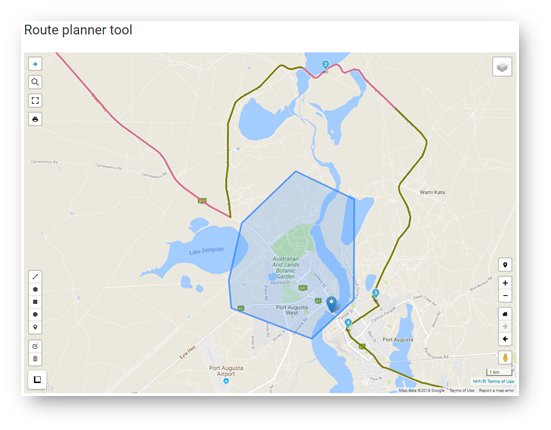
Draw Tools
Select the required drawing item:
Line, polygon (free-form shape)
Square
Circle
PointThe drawing tools will not appear until a route has been created.
Click on the map to commence drawing.
Lines and polygons will allow multiple points. Rectangles and circles are drawn by clicking and dragging to the desired size.
There are additional layers that are not approved heavy vehicle networks, but assist in planning a route:
1. The State Road Network layer shows all roads under the control of a State Road Authority.
2. Known heavy vehicle bypasses are available as a separate layer.
3. Key transport points for planning fatigue breaks and delivery locations.
4. Various boundaries can also be added.Displaying additional layer information
Select the layer to view the legend.
Zoom in on the map and select the section of the route to view the related restriction/condition information.
Where there is information for multiple layers, use the left and right arrows to scroll and view.