Build a vehicle configuration
- John Barry
- Former user (Deleted)
- Linda MacDonald (Unlicensed)
- Former user (Deleted)
There are over 50 components available to create accurate models of your vehicles, which can then be saved for use in new permit applications. There is also an option to give custom names to your vehicle configurations for easy identification. Once setup, reusing your vehicle configurations will cut down on your data entry.
- Navigate to Access Permits> Vehicle Configurations from the home page via the blue tile or the side navigation bar.

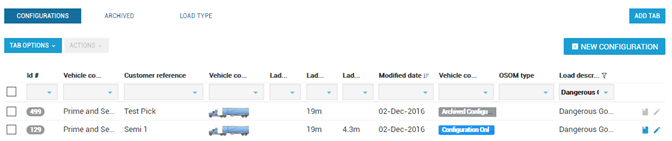
View saved vehicle configurations
- All saved vehicle configurations for the active account will be listed.
- Scroll through the list or use the drop-down filters to find the vehicle configuration required.
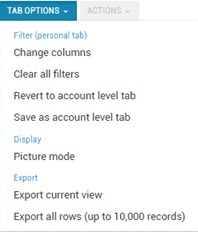
- Select Tab Options> to clear filters, switch between picture and table view or export information.
Use an existing vehicle configuration
- Check the box next to an existing vehicle configuration.
- Select Actions> Apply, Copy or Archive.
Create a new vehicle configuration
- Select New Configuration.
Create a vehicle name or reference, click OK.
Using consistent naming conventions will make it easier for you and your team to find configurations in the future.
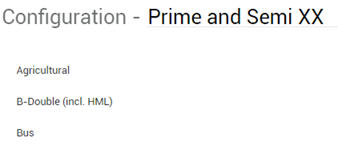
- Click Select Configuration.

Choose a vehicle from the list as the base for the build and/or chose to custom build.
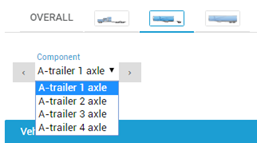
- Select Add Components / Remove Components to build the vehicle configuration. The vehicle image will adjust with the selections.
- Complete all required component details.

- Select each component individually by using the component tabs to the right of the Overall tab, if required.
- Use the arrows and drop-down list to view additional options for a component.
- Click I confirm selection of the correct component.
Click Save then Exit to return to the Vehicle Configurations screen.
When you click on the component, it will highlight the component in the picture view.
Now you can apply for a permit, see Apply for a permit.