You can choose how you prefer to navigate around the Portal.
Dashboard Layout Tab
- Select the Dashboard Layout to display a custom view of your Cases and Notifications.
Dashboard Layout Tab
Select the Dashboard Layout to display a custom view of your Cases and Notifications.
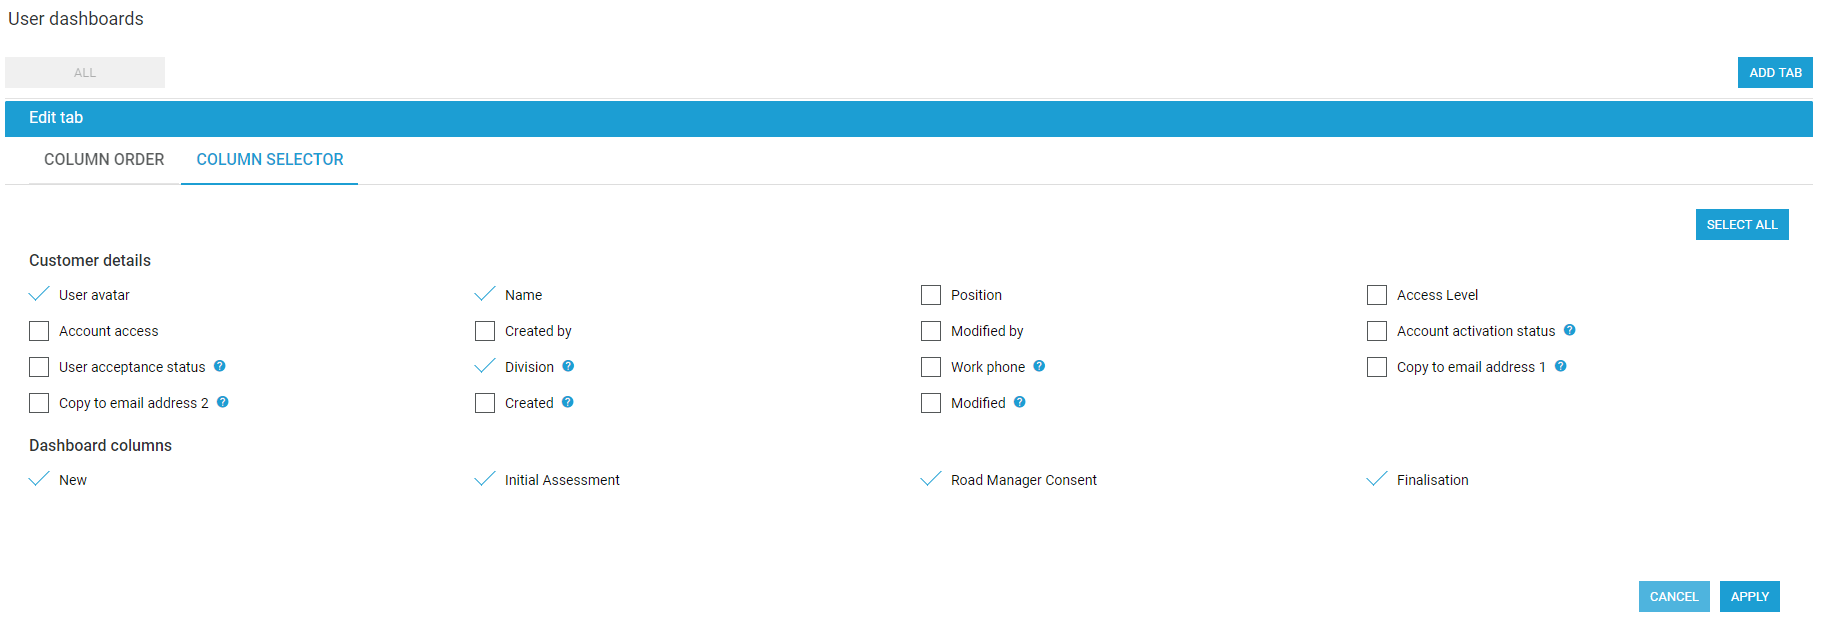
Customising Dashboard Layout
- Select Reports > Dashboard.
- Add columns to the existing table by selecting TAB OPTIONS > Change columns. Then on the COLUMN SELECTOR tab, tick the checkbox against the column you wish to add and click APPLY.
- Or for regular reporting, use ADD TAB on the right to create a new table by again using the COLUMN SELECTOR.

Then sort table values by
the coloums to display the required reporting.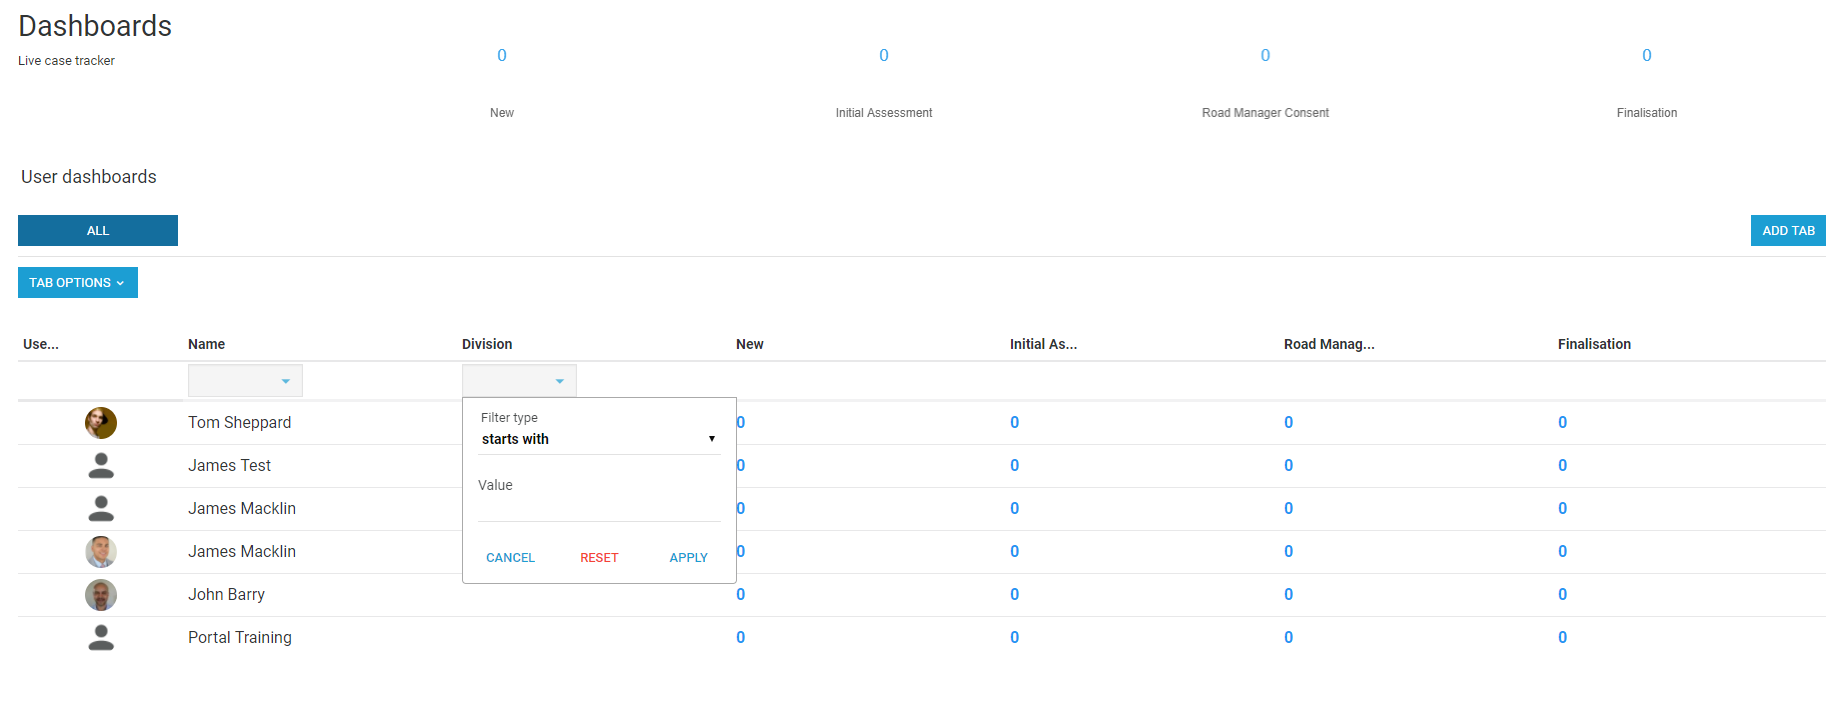
Customising Dashboard Layout
- Select Reports > Dashboard.
- Add columns to
the
existing table by selecting TAB OPTIONS > Changecolumns
. Then on the COLUMN SELECTOR tab, tick the checkbox against the column you wish to add and click APPLY.Or for regular reporting, use ADD TAB on the right to create a new table by again using the COLUMN SELECTOR.
Then sort table values by the coloumsto display the required reporting.
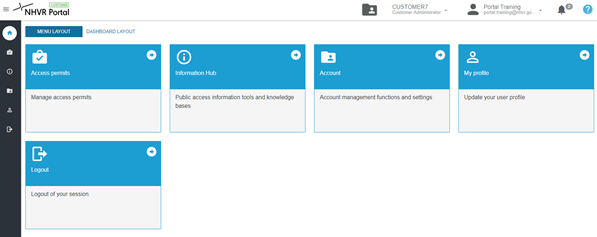
Menu Layout
- Select the Menu Layout to display the Tile Navigation, where you can select the key function areas and click through to open.